site stats

Monday, August 24, 2009

Simplifying

While working on our Miquon labsheets ... ... ...

Me: Er... three-sixth? Can that be simplified?
B: Hmm... oh yes! One tooth!
Me: Ha?
B: I mean half.

Monday, August 17, 2009

It's All About Readiness

Six month ago, I started a math problem solving assessment book with my boys. Somehow, my boys had difficulty drawing the models. I know that they understood the problems because they could tell me the answers to the question. They saw the whole model drawing process very tiresome and complicated; they couldn't see the need to go through all that trouble to solve what could be solved mentally. So each session was met with a lot of resistance.

My assessment of the situation? Laziness, ill-disciplined, blah blah blah... everything negative :-(

I finally decided that this is not a battle I want to fight. Math had been one of their favourite subjects. I don't want to change that. We put the book aside and have been working happily on our Miquon labsheets since then.

Just this week, I blew the dust off those books and tried them out again. They completed what would have taken 30 minutes previously in just TEN! Boy! Was I surprised?! What shocked me more was when B said, "Can we do more?" :-o

What happened?!

I am slowly beginning to believe what I read. Some homeschool parents have assured that it is perfectly okay to start formal math at age 10. The Moores and Bluedornes come to mind. Their take is that less effort is required for learning when a child is developmentally ready. I am not that "brave" to take it to THAT extreme. But it is a good reminder that I don't need to get frustrated if they don't "get it" NOW... ... ... They will "get it" ... one day.

Tuesday, July 21, 2009

Art: Skies


I am always spellbound by the beauty of God's art work. Just look at how he paints the sky! This picture is taken from our window.

Here are my boys' attempt at capturing some of such brilliance.


We used a mixtures of 3 different techniques:

1. Sunset
Wet wash and blending
2. Cumulus Clouds
Clouds are white and left unpainted.
Cloud rounded on the top and flatten underneath. Clouds nearer the horizon are thinner.
Layering by adding raw sienna onto the base of the clouds while paint is still wet.
3. Stratus Cumulus / Cirrus Clouds
Wet wash and blotting damp wash with dry brush or crumpled tissue.
This little exercise was a side projects in our Jan Van Eyck study. He was known to be very observant of his surroundings and so our little artists were challenged to paint something of their own surroundings!

Sunday, July 12, 2009

Chinese Booklist

I benefited from the Chinese book list posted by a fellow homeschooling mother in her blog. I had checked out some of her books and really liked them. So I thought it would be useful to list here, some of the Chinese picture books we have enjoyed recently. They might not be hot from the press, just what caught our eyes: [library reference code]

  • 五个小怪物 [JP DYE] -
  • 在森林里[JP ETS] - translated from In The Forrest by Marie Hall Ets
  • 爷爷的天使 - my personal favourite
  • 布朗家的天才宝宝 - comical
  • 布朗家的超级明星
  • 岩石上的小蝌蚪 [JP XEH]
  • 鲸鱼 [JP GOM] - reminds us of the Nazca drawings we read about in our history
  • 两个好朋友 [J ESC]
  • 两个好朋友的争吵 [J ESC]
  • 院子里的小岛
  • 我不想生气 [JP MOR] - short book about anger management (will want to look at others in the series)
I just want to make special note that we really love 爷爷的天使. It is a living book due to its wonderfully thougth-provoking illustrations. This book is about a grandfather's reflection of his whole life on his death bed. He spoke with pride about his bravery when he was young and how nothing terrible seem to ever happen to him; even through the war years. But as you read, you see pictures of his guardian angel protecting him time and time again. Then you will realize that he really had nothing to boast about at all.

Here is a picture of him falling down a tree but was not hurt because he was cushioned by his angel...


Other pages showed him boasting about how he dared to walk along dangerous deserted paths. At a corner, his guardian angel puts her hands over the eyes of his potential attacker...

This book brings to light how we often take God for granted.

My boys love to scrutinize the drawings. It became especially relevant one day. Their grandparents brought them to cycle so that I could have a "break". It was an exceptionally challenging trip for them. They cycled along the park connectors from Bedok to Changi AND BACK! Well, that is not all that impressive...

Along the way, D lost control and cycled into a HUGE drain. It was so deep, if Grandma had not been cycling behind him, nobody would have known where he had gone. His bike and him just disappeared completed. He was eventually fished out of the drain with minimal scratches! I was told, the drain was DRY and had LOTS of dried leaves in there to cushion his fall. This is clearly God's hand of protection!

Wednesday, June 24, 2009

Chemistry Week - Laboratory Experience

We attended a series of laboratory sessions at the Singapore Science Centre during their Chemistry Week. Most of the workshops used concepts in Chemistry learnt at the Secondary 3/4 level. Of course, my 8 year-olds don't get it all! But they had fun just "playing" with the apparatus. ;-)

For the sake of future reference, I will go ahead with noting down the specifics of what was done.

Workshop 1 - Sulfur Dioxide and its Role in Preserving Food


What we did :- We tested for the presences of SO2. Hydrogen peroxide was added to food samples (preserved mango, dried sour plum, preserved papaya, raisins, potato chips, fruit juice). This causes SO2 to be oxidised to form sulphates. This sulphate will precipitate out as barium sulphate when barium chloride is added.

My observation :- Boys got the droppers all mixed up and in the process contaminated the solutions!


Workshop 2 - Recycle Paper - Transform Newspaper to New Paper

What we did :- We blended newspaper shreds in a blender with some water. The resultant pulp was gently laid on a mesh that is submerged in a tray of water. The pulp is spread evenly to dry.


Some dried flowers were sprinkled throughout.

We had some leftover pulp, so we made a smaller circular shaped paper.


My observation :- This is the most straight forward of all the workshops. The boys needed to learn that "more doesn't mean better"... I had to remove most of the dried flower they "dumped" onto the paper.


Workshop 3 - Hydrogen Fuel Cell

What we did :- We produced hydrogen gas by reacting magnesium with hydrochloric acid. Hydrogen gas was tested using a glowing splinter.

Too slow in preparing the glowing splint. Ops... fingers too small to stopper over test-tube opening, so most of the hydrogen escaped! ... Managed to get a soft "pop"sound (positive test for hydrogen). Phew!


The set up here was used to electrolyse water.


Green solution of Universal Indicator was added into the water. We observe that the colours at the two graphite electrodes were different. The indicator cahnged to orange (acidic) on the anode (left arm) and violet on the cathode (right arm).

The electrode reactions are as follows:
at the anode:
2H2O(l) → O2(g) + 4H+(aq) + 4e–
at the cathode:
4H2O(l) + 4e– → 2H2(g) + 4OH–(aq)
Overall:
2H2O(l) → O2(g) + 2H2(g)


The aim of showing the children the electrolysis of water is to show the working principles of a hydrogen fuel cell. The electron gradient produced can be be channelled through an electrical circuit.


Workshop 4 - Green Chemistry - Balance with Nature


What we did :- We investigated the greenhouse effect of carbon dioxide. Two identical set up like this was set up.


Carbon dioxide was put in one of the boxes. The thermometer poked into the box allowed temperature in there to be taken over a period of 8 minutes after the lamp above it has been switched on. The temperature gradient was significantly higher in the box with carbon dioxide.


This was another experiment where we investigated on the effects of various solution on shells. You can see that there is a hole in the middle of the shell on the left. That is the result of submerging it in hydrochloric acid. This experiment aims to show the effect of acid rain.


Conclusion : I realized that my boys had a lot to learn about basic laboratory skills! These include measuring, planning and general apparatus handling. I found a simple lab sheet on Laboratory Safety and Measurement that we can work through at home. Alright, more hands-on session at home from now on...

Sunday, June 21, 2009

Horse Unit Study (part 5) - Drawing Horses

For Art, we were broke away from our usual and galloped off on horses! Let me explain...

We were in the mood to draw horses since we have been reading so much about them. But horses aren't exactly the easiest animal to draw. So I pulled out some of my art books to see what I could put together. I read from How to Draw Animals by Jack Hamm. This book is published in the 1960s but yet the clarity of its instructions far surpasses that of more recent how-to books on the same subject.

What started out as a simple copying of horses unfolded into many successive sessions on animal drawing!

We started working from the beginning of the book where we learned about the shapes found in a generalized animal. We then learn how to put those basic shapes together when we look at an animal.

Here are some outlines we copied from the book. Notice the shoulder muscles, hip muscles and rib cage. These outlines are supposed to help in later shading and rendering of other surface details.

Shading of a generalized animal body was the emphasis for the next few sessions. It really gives the drawing depth and perspective.

Here's an attempt at applying the above concepts. I let my boys try outlining the animals from looking at photographs of animals. I wanted to see if they understood the concept. This is what they produced. Here is my boy's drawing of the basic outline of a donkey. He looked at a photograph in our Apologia Zoology 3 book.


The later part of Hamm's book focuses on different animal types and the usual challenges of drawing these animals. We jumped ahead to the section on Horses. (Couldn't wait!) We copied some of the horse drawings in that section.

Then each of us selected a picture of a horse from one of our other books to copy. Here are my boy's outlines. This was B's sketch from James Herriot's Treasury for Children.


This is D's mustang sketched from Album of Horses by Marguerite Henry.

Drawing and colouring are two separate skills. In the past, I noticed that my boys will be very discouraged when their colouring "ruined" their nicely drawn pictures. This time, I decided to make photocopies of their drawing for them to colour on. This is so that credit can be given to the drawing as well as the colouring; and each having something to show for. We used oil pastels. I joined in the fun too using my boys' drawings.


Drawing animals is indeed very challenging. A mistake in proportion can make a deer look like a dog, or a horse like a cow! For a long time, I myself have shied away from drawing animals. I am now glad I overcome my own phobia and gave it a try because I am pleasantly surprised at my boys' enthusiasm. I guess children just have a natural affinity for animals. I now wished I had done this little off tangent project sooner when we still had our zoo membership!

Wednesday, June 17, 2009

Science :Botany - Ferns

I found it difficult to complete this chapter on ferns without mentioning the concept of the alternation of generations in plants. In the end, I decided to introduce it to my boys. These are some useful sites:
My objective is to expose them to the concept. I didn't want to overload them with technical terms.

I found a good diagram in one of my old Biology books called Botany: An Introduction to Plant Biology by Mauseth. (Here is another good diagram.) It shows the haploid and diploid parts of the fern in its life cycle. I found the easiest way to get my boys to understand this complex concept was to let them colour the diagram; using yellow colour to indicate the parts that are haploid (with one set of genes) and green colour for the diploid(with two sets of genes) parts. The "ah-ha" moment came as they were colouring.


From there, I could then further make a comparison between the spores of the ferns and the seed of flowering plants. They are not quite analogous. The spore is haploid while the seed is diploid, the result of a fertilization process.


We collected sporangium from our fern to view under our Brock Magiscope (mag:200x). I managed to capture it on my camera just by positioning the camera directly over the eyepiece!


You can see the thin side walls of the sporangium and the very faint outlines of the spores within. The cells surrounding have jointed rings (annulus) that will strighten hygroscopically to break the thin side walls, throwing out the numerous spores within. We left the whole set up as is to continue with our other activities for school. Three hours later, this was what we saw. The sporangium opened!


Visit Rumphius Science Webpage to learn more about how we approach Science in our homeschool.

Tuesday, June 16, 2009

Science : Botany - Gymnosperms

We learned about the different types of gymnosperms. Those that bear pollen cones or seed cones are the conifers. Those that bear berry-like cones are like junipers and yews. Then there are special ones that don't really bear cones but still have "naked" seeds, as is the characteristics of all gymnosperm. They are the ginkos and cycads.


One section focused on Softwood versus Hardwood. I proceeded to read a picture book called Woodlore by Cameron Miller and Dominique Falla. I picked this book up years ago in a garage sale. I was naturally attracted to its contents as my home has always been stocked with wood of all types. It starts out like this:

Yew trees grown throughout the ages,
Have the wood the bowyers favors.

Maple and spruce are always kings

For makers of lutes and violins.


This book is written in poetic form telling which types of wood are best for what purposes. Interesting!

The Elementary Apologia Science books have sections called Creation Confirmation. I love these as they are so important in building up our faith. Here's my boys narration for one of such sections in this chapter:
The world-wide Flood happened about 4700 years ago. We know that by counting the generations of people in the Bible. All trees will die in the world-wide flood. Seeds will still survive. All trees alive now must have grown after the Flood. The oldest living tree is 4700 years old. That is a good evidence that the Flood took place at about 4700 years ago.

Visit Rumphius Science Webpage to learn more about how we approach Science in our homeschool.

Monday, June 15, 2009

History of China... Preliminary Plans

We visited the Asian Civilizations Museum three weekends ago to view the Kangxi Emperor Exhibition: Treasures from the Forbidden City. It was International Museum day and that meant the public could enter the museum for free!

My personal favourite object in the exhibition is a painting (on hand-scroll) that is 22 metres in length, depicting Kangxi emperor on his second inspection tour. We had fun studying the details of the painting and trying to spy where the emperor was. It's a pity we were not allowed to take pictures in the exhibition...

We spend some time musing at the not-so-ordinary family tree- what with 50 wives and 55 children!

Our interest in the History of China was sparked off and I am now researching to see how I can incorporate Chinese history into our History curriculum. That was my original plan anyway. I just haven't sat down to seriously do my research.

There is a spatter of Chinese history in Story of the World, but in my opinion, too superficial. Being Chinese, we ought to know more. It is a pity our command of the Chinese language isn't good enough for us to use Chinese history books (or any primary sources), we would have to resort to those in English instead.

Here are some things I've managed to find so far...

An Amazon Listmania provided me with a list of books I could use to explore deeper. Two books stood out from the rest; The Story of Ancient China (from Neolithic times through the Tang Dynasty) and its sequel China's Later Dynasties (mainly on China's last four dynasties - the Song, the Yuan, the Ming, and the Qing) both by Suzanne Strauss Art. They are written for middle school students (ages 10-14 yrs old) and look like wonderful spine books I could use for our study on the History of China!

Here are some websites with important information that is geared for children (I will add on to this list if I find more useful sites):

Post update on 12 July:
I found a unit study called Ancient China: To the Great Wall and Beyond by Judy Wilcox. This is a twelve-week study that brings you through eleven key dynasties through reading and project work. One interesting point brought up in reviews (1 & 2) was the fact that the student is challenged to research and make biblical contrast. Efforts were even made to relate historical events in China to the biblical timeline for context. This looks really promising!

Post update on 14 July:
Here are 2 books available as etext on Chinese History:
1. China's History by William E. Griffis
2. The Story of China by R. Van Bergen

Wednesday, June 3, 2009

Science : Botany - Trees

This post highlights snippets of what we did for the chapter on Trees apart from our usual read aloud and narration of our Botany book.

We wanted to find out more about heartwood and sapwood. We found this site (Wood Magic) with very clear explanation. In fact we completed a notebook page based on our read alouds through these pages.

I made a set of 3-part cards for Twig Anatomy while my boys made theirs on the new vocabulary for this chapter. I just could not find the time to prepare these before hand. I have decided to keep it simple; no fancy coloured borders, no printed words, no lamination. I just coloured the respective parts of the twig and wrote the name of the parts down!


We reviewed our old 3-part cards for flower anatomy because my boys have forgotten that. I needed them to know because this chapter introduced the concept of "imperfect flower". Cannot expect them to know what is an imperfect flower if they don't first know what is a perfect one. Just love these 3-part cards. They are so convenient to pull out for reviews whenever we need it.

I decided to teach my boys the shapes of tree crowns. Different websites use different terminologies so I thought I'd just introduced them all. (They can be seen mainly in these two pictures: 1 and 2)
1. round/spherical
2. oval
3. V-shaped/vase/funnel
4. cone/pyramidal
5. columnar/tube
6. spreading/umbrella
7. weeping
8. irregular
This post is long overdue. I had initially wanted to follow this chapter up with an Adopt a Tree project that would continue for at least a year. However, some circumstantial changes at home has caused me to think we might not be living here for that long. This has caused me to procrastinate for quite some time; and was tempted to abort the plan altogether.

My original plan was to observe an adopted tree (within our neighbourhood) regularly over at least a year to see if we can observe any growth change or patterns. I noticed that some trees flower only at certain times of the year and some even shed their leaves almost completely. I am not sure these cycles follow a strict time period, so I thought it would be nice to investigate.

I later decided to allow my boys to make their observations anyway. This would serve to review many of the concepts covered in previous chapters. The following observations were made of their adopted tree. These will also be the guidelines for any of our future tree study:
1. tree - shape, height, branching patterns, height of lowest branch,
2. trunk - girth, bark texture
3. leaf - shape, size, margins, venation
4. flower - colour, growth pattern, petal arrangement, predict pollinator
5. fruit - colour, type, predict dispersal mode


Visit Rumphius Science Webpage to learn more about how we approach Science in our homeschool.

Monday, May 25, 2009

Horse Unit Study (part 4) - Horse Breeds

We are slowly soaking up all we can from our readings and making minibooks for our Horse lapbook as we are gathering new information.

We have been reading about various horse breeds in Album of Horses by Marguerite Henry. The history of the more common breeds are described in well-written prose. The language used is a little too sophisticated for my eight-year-olds. Even I am unfamiliar with many words that were used :-b But the information given is just too fascinating to miss. So I tried to get round the language problem by reading just a paragraph or two, then stop to discuss about what we can gather from that section. Many inferences had to be made and this skill has yet to be honed. Only after the discussion did I get my boys to narrate (just that section) while I type it out. It was a very slow process but I think it was good training.

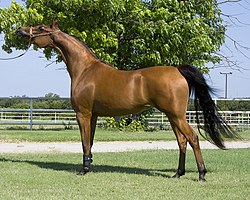
Here is what we gathered about the Arabs:

Type of Horse: Riding Horse

Country of Origin : Arabian Desert

Size: 14.2 – 15h

Colour : The Arab horses can be any colour but must have black skin underneath so that it can protect them from the sun’s ray.

Interesting Facts:

Arabian horses can survive on very little food. If there isn’t grass to graze on, they can eat dead locusts, bruised dates and dry herbs. Arabs are used for war. The Arabian fighters ride only the mares and they call them “Daughters of the Wind”.

The owners will always make sure that the mares mate with the best Arabian stallions so that the colt will be the best. The owners will let the horses drink camel milk even before their own family drinks. This is how well they treated their horses. The colts are given camel as stepmothers to nurse on.

There are two famous people who rode on Arabian horses. George Washington rode on an Arabian horse called Magnolia and Napoleon rode on one called Marengo.

Arabian horses have arched necks and high flung tails. Their bodies are slender. They are the oldest domesticated horse species in the world.

More of these little write-ups will be added into out lapbook as we continue to read about the other breeds. Although my boys wanted to read about ALL the breeds, I insisted that we at least first cover the Thoroughbreds, Shire, Lipizzan, Mustang, Appaloosa, Quarter Horse and Shetland Pony.

Saturday, May 23, 2009

More Good Books to Read Aloud for Art

A friend of mine (Thanks F!) shared a wonderful etext that will be a great resource for our future artist study - Knights of Art: Stories of Great Italian Painters by Amy Steedman.

I have known quite long ago of an art book by V. M. Hillyer. (He is the fantastic author of Child's History of the World and Child's Geography of the World!) I was intending to buy it secondhand. But because it is so good, the price is still high even when the books are old. I recently found a site that gives the etext of his book, A Child's History of Art.

I am now DANCING A JIG!!!

PS: If you have other good Art related books to recommend, please do leave a note here using the "comments" function. Thanks!

Tuesday, May 12, 2009

Art : Jan van Eyck : Read Aloud

We are currently reading through Looking at Pictures: An Introduction to Art for Young People by Joy Richardson . My plan is let the chapter on "Hidden Meanings" coincide with our picture study of Jan van Eyck's painting "The Arnolfini Portrait".

This particular painting is also featured in Art Fraud Detective by Anna Nilsen. This book will be next in line in my boys' assigned reading list to heighten interest. Readers are supposed to pretend to be detectives to find out who painted the fakes in a gallery of paintings and hopefully learn a thing or two. Looks like fun to me!


Visit Rumphius Webpage Art to find out about how we approach Art in our homeschool.

Wednesday, May 6, 2009

I Wish I Were a Fish (a poem)

We read a few poems with this form: AAB, CCB ... and liked it. A well-known one is the poem At the Seaside by Robert Louis Stevenson. We composed a poem using this form; drawing inspiration from the guppies in our aquarium.

I Wish I Were a Fish
How wonderful it is to be a fish
To always be free to swim and swish
My delicate rainbow tail.
I can sleep whenever I'm tired
And have lots of peace and quiet
No noisy siblings with tiresome tales.

I can play hide-and-seek all day
On pastures of green algae
Or chase and dance with pretty ladies.
No use crying if my friend dies
Just nibble him up! Isn’t that nice?
A fish's life is filled with jollies!

Horse Unit Study (part 3) - Horse Poetry Book

We found an anthology of poems on Horses called A Classic Illustrated Treasury: Horses at the library.

There was even one poem by William Shakespeare!
Round hooft, short jointed, fetlocks shag, and long,
Broad breast, full eye, small head, and nostril wide,
High crest, short ears, straight legs, & passing strong,
Thin mane, thick tail, broad buttock, tender hide:
Look what a Horse should have, he did not lack,
Save a proud rider on so proud a back.
I was a little amused at how Shakespeare used pairs of adjective-nouns in this poem. That was somewhat similar to what we'd started out with when we first drafted our poem on the Centipede!

Another poem stood out from the rest.

My Pony
by "A."

How charming it would be to rear,
And have hind legs to balance on;
Of hay and oats within a year
To leisurely devour a ton;
To stoop my head and quench my drought
With water in a lovely pail;
To wear a snaffle in my mouth,
Fling back my ears, and slash my tail!

This poem gave me an idea for our next writing assignment! In my following post, I will share our poem on how wonderful it is to be a fish. :-)

Tuesday, May 5, 2009

Horse Unit Study (part 2) - Picture Book Study

We did a Five-in-a-Row styled book study of a picture book Mrs. Mack by Patricia Polacco.

I chanced upon this book while I was searching for free lapbook templates on horses. I got all my teaching ideas from this page in homeschool share. I used most of the suggestions there and we learned loads! (More lessons plans for other books in this site! A treasure trove! We used most of the lapbook templates from the links on this page. I will post more about that in a separate post.)

I think this story is not one that will appeal to all readers. The subject matter is a serious one but written from the heart. It is an autobiography of the author's first experience learning how to ride a horse and the special relationship she shared with a horse, her riding coach and her riding friends. We read this book with great interest because our first riding experience was still fresh in our minds. I remembered being told to "keep my hands soft" and "don't hang on to the saddle horn!"- familiar words Mrs. Mack reiterated.

Wednesday, April 29, 2009

Changes for English

I found the First Language Lessons (FLL) by Jessie Wise a wee bit tiresome due to constant repetitions. And since I am already reading poems and requiring narrations, I found those lessons with these elements quite unnecessary. I have been wanting to discontinue FLL for some time.

So when a friend recommended Grammar Land by E. Nesbit, we immediately got hooked on it. This book is a very refreshing way to "study" grammar. It basically introduces the different parts of speech. It does so with a very engaging story. My boys will surely not forget rich Mr Noun and shy little Article, or how Adjective was tried for stealing from Mr. Noun.

I have just started out Rod and Staff English 3 (R&S), a book I was planning to use after FLL. Other aspects of Grammar (other than parts of speech) is covered here that I felt I still needed to address. I guess having come out from a system where grammar was "taught", I still cannot let go and trust that read aloud/copywork/dictation alone can do the trick.

Lessons in R&S English are short and manageable. I try to do most of the exercises that follow orally instead of assigning them as written work. That should help save some time.

Sunday, April 26, 2009

Learning the Constellations (Part 2)

After the excitement of spotting the Southern Cross, I decided it would be nice to be more familiar with all the other constellations. It has always been my dream that we can know the skies like some "wise men of the east". And hey! There just happen to be three of us! Hahaha...

I have been thinking of how we can systematically learn the constellations. Here is my plan.

I have chosen to use Stars: A New Way to See Them by Rey as our text and reference constellation chart. The lines he drew makes up a picture that better depicts the object that the constellations were named after (Rey tells you in English what those constellation names are.). This makes more sense than many other versions I have come across. You can have a feel of connecting the constellations using Rey's scheme here (These are not as detailed as those found in the book).

Another good point about Rey's charts is that they show the magnitude of the stars. This helps a lot in identifying a constellation. The relative brightness of the stars can help with differentiating say the Southern Cross from the False Cross.

There are 17 detailed constellation charts in the book. I figured that if we can familiarize ourselves with one to three charts a month (that is about the range that is visible in Singapore, right overhead, in a month) we will be able to cover most of them in a year or so.

I thought of a 3- stepped method:


Step 1 - Copy

Using the idea of copywork, I have asked my boys to copy the constellation I have chosen (based on what is visible during this time of the year) on our whiteboard. Brighter stars were represented with magnets.


This is my boy's version of the Centaur and Southern Cross.


Step 2 - Identify

I made quiz cards by punching holes on black paper to see if my boys (and I) could spot the constellation they have just learnt. These are replicates of chart 11 (Virgin, The Scales, Crow), 12 (Serpent Holder, Scorpion) and 17 (Southern Cross, Centaur, Wolf) from Rey's Star. Each chart is about 15 cm wide.


They look like real stars when held up against the light! I wanted these quiz cards to be circular so that one would have to figure out where north is. This is to me a very necessary life skill! See if you can spot the Southern Cross and the Centaur on any of these.
How did I make these?
I made a photocopy of the constellation chart from the book, place the copy on top of a piece of black paper and push pins on where the stars are supposed to be (making sure that the pins go through the copy as well as the black paper). I use pins for faint stars, a bicycle spoke (satay stick would do too) for brighter stars and a whole series of hole punchers with varying diameters for the very bright stars.
If this sounds too complicated, here is another idea that I have been toying with. It uses film canisters. (canister constellation template found here)

Step 3 - Star gaze

Obviously, the best way to acquaint oneself with the night sky is to gaze at it more often. We have started with the constellation we have learnt. It is interesting to see how the two-dimensional sky charts translates out into the vast night sky. We are not good at the real thing at all but I am hoping that we will improve with practice. :-b

The light pollution and the often overcast skies have been our main problems. Living in the heart of a densely populated estate also means we don't have one single location where we get an unobstructed view of the whole night sky. We have a relatively good view of the southern sky from our balcony, a not so satisfactory view of the northern sky from the staircase on the top floor of a neighbouring block of flats (corridor lights are really hampering our efforts) and a reasonable view of the sky right overhead from in the middle of the field in front of our block.

We go star gazing with our star charts (Rey's and one from Astroviewer that shows where the planets are too!), red flashlight (so we can look at your star chart without spoiling our vision for the stars) and a mat (to prevent neck aches!). I would love to have a green laser pointer (more information here) except that I found out that one costs a whopping S$400!!!


Here are some other tidbits I have found:
  1. I recently bought a book published by the Singapore Science Centre called A Sky Book for the Tropics by Heong Kam Khow and Kamaria bte Abdul Ghani. It has the monthly star maps for the evening and predawn sky in Singapore.
  2. This interactive site can be useful. It allows you to "see less stars", meaning that they reveal only the brighter stars. This gives a more realistic picture of what you are likely to see in a light-polluted sky like Singapore's. Constellation lines and names can also be switched on and off according to your preference.
  3. My boys enjoyed another interactive site that gives an introduction to Orion and the Big Dipper. You read, look at the picture, click "next", follow instructions to spot constellation and so on.
  4. Notebooking pages on the 27 constellations.
  5. Cute song about the constellations.
  6. Ebook/etext The Stars and Their Stories by A. M. M. Griffith.

Friday, April 24, 2009

Caterpillars


Last Friday, we were at a park and found a flowering plant that was infested with caterpillars. My boys were exhilarated!

We had many close encounters with caterpillars previously. We have so far managed to morph just one caterpillar but missed observing the crucial processes. Since then, we have been on a lookout for caterpillars. On most occasions, the one miserable caterpillar that we managed to find will die on us because we do not have the correct leaves to feed them.

This time, my boys made sure they harvested plenty of the leaves (and even flowers!) from the plant that they found the caterpillars on. They wanted to be sure we were successful this time so they harvested about 5 caterpillars!

These five hungry caterpillars ate up ALL the plant material we collected in less than a day! I wasn't too optimistic that these will survive. They were tiny and so would need a lot more food to fatten up before they are ready to weave their cocoons. It wasn't practical for us to go back to the park everyday to harvest fresh leaves for our caterpillars, so I did the most convenient thing; I plucked some leaves from one of my plants in my balcony. These were leaves that have yellowed and were those I would remove anyway so I didn't mind. To our delight, the caterpillars devoured these leaves!

We are left with three caterpillars. Two have escaped. We noticed that the smaller ones were able to squeeze through the tiny holes on the plastic aquarium we put them in. In fact, on the first few days, we found escaped caterpillars crawling on the floor. We have since transferred them to another more secure container.

A week has passed and the caterpillars are still alive, eating and growing. We are waiting and keeping a close watch ...

Thursday, April 23, 2009

Drawing Trees

In order that my boys could appreciate shapes of tree crowns, I decided to teach them some basic techniques of drawing trees. I used an exercise shown in The Usborne Book of Art Skills. We used oil pastels to draw many possible types of trees from imagination.

Oil pastels allows layering of colours and this makes the trees looks more realistic. The green of the leaves on a tree is seldom one green but made up of many shades of greens and even blues, greys, red or yellows.

Some time ago, I bought a small set of oil pastels (Cray-pas) that were recommended by Artistic Pursuits for each of my boys. Those were a set of 16 colours. We found that the colours were very limited. There were only two greens and they were unnaturally bright :-( We ended up pulling out my antique set of oil pastels that I used when I was seven! That was a pack of 48 pastels. Some were a little hardened but applying pressure revealed the softer pastel within. These worked fine!

We tried using dots, short strokes and squiggles to achieve the effects of leaves seen from afar. Looking out of windows, we talked about which of the different techniques will give a better representation of each of the trees we see.

The next step would be to try these techniques out on one of our nature walks.
Related Posts Plugin for WordPress, Blogger...